Wednesday, November 28, 2007
STEP ON HOW TO INSTALL WINDOWS 98
How to install Microsoft Windows 98.
Below are the steps required to install the standard version of Microsoft Windows 98 and the Second Edition of Windows 98. It is important to realize that some computer manufacturers may have their own install of Windows 98, therefore the below steps may not all apply to how Windows 98 is installed on your computer. If the below steps do not apply to your computer's setup of Windows 98 and you are unable to determine how to install Windows, it is recommended you contact your computer manufacturer for additional help; Computer Hope will not how to install Windows using your manufacturer CD.
- If you have not already, you may wish to read through document CH000186 for additional information about erasing your hard disk drive and starting over.
- From the MS-DOS prompt, switch to the CD-ROM drive; commonly this is the D: drive. Additional information about switching drives in MS-DOS can be found on document CH000515.
- Once in the CD-ROM drive, type cd win98 and press enter.
- Once in the WIN98 directory, type setup and press enter.
- Press Enter to start the check and this should start the Microsoft Windows 98 setup installation. Microsoft Windows 98 will start by checking the hard disk drive for any errors; once completed, press the Continue button to start the installation.
- If you agree with the Microsoft Windows 98 license agreement, check I accept the Agreement and click the Next button.
- If you are installing Windows 98 SE, Insert your Microsoft Windows 98 SE product key. If you have lost this key, please see document CH000156.
- If you are using the Microsoft Windows 98 SE upgrade CD, you may be prompted to insert the original Windows 98 CD or point to the Windows 98 setup at this point.
- Windows 98 will then prompt you to where you wish to install Windows 98. Unless you wish for a different directory, leave it at the default C:\Windows directory and click Next.
- Choose the Type of Setup you wish to do; most users will wish to remain with the Typical setup. Once the setup has been selected, click the Next button. If you have chosen a setup other than Typical, the below steps may not all apply to your setup.
- Choose Install the most common components (Recommended) and click Next.
- Enter the computer's Identification, if you do not plan on connecting to the computer to a network you can leave the default data and click Next. This information can also be entered later.
- Enter your location and click Next.
- Click Next to create a startup disk.
- If you do not wish to create a startup disk, Click Cancel, otherwise put a blank diskette in the computer and click Ok.
- Click Ok when prompted to remove the disk.
- Click Next to start copying files.
- Once ready, click Okto restart the computer. Make sure if any diskette is in the computer that it is removed from the computer.
- If you are installing the original Windows 98, you may be prompted for the Product key after the computer restarts; insert your Windows 98 product key and click Next. If you have lost this key, please see document CH000156.
- Continue through the remainder of the setup answering each of the questions.
STEP ON HOW TO INSTALL WINDOWS 2000
Installing Windows 2000
Installing Windows 2000 can be a good or even a great experience. This is especially true if you have spent any time at all around Windows 95 or Windows 98. Windows 2000 is truly intuitive in the way it handles hardware detection and installation routines. It can, however, also be what nightmares are made of if you try and merely install it without any pre-installation preparation and hardware verification.
Pre-installation Considerations
A new installation, or "clean install", on a checked and formatted hard drive seems to be the best way to install Windows 2000, especially in those instances where the original operating system, such as Windows 3.x, cannot be upgraded to Windows 2000 Professional. You should review the Advanced Setup Options as part of the process of determining how you intend to install Windows 2000.
As part of the consideration process, you should run the Windows 2000 Readiness Analyzer on your present system to determine if there are any hardware or software problems that you may be unaware of. You can learn more about the analyzer by clicking this link: Windows 2000 Readiness Analyzer
As an aside, you can upgrade from either Windows 95 or Windows 98 and you can also upgrade the Windows 2000 Beta 3 to the released version of Windows 2000 Professional.
If you need more information about upgrading from the Beta 3 version, then visit this link: Upgrading from Windows 2000 Beta 3
Upgrade vs. a New Installation
During a new installation on a freshly formatted drive, the setup process will install Windows 2000 and all of its components in new folders. When you install the operating system fresh, you place the operating system in a known state, presuming that you follow the suggestions we have provided.
That "known state" consists of the following:
-
You have checked your computer's hardware to insure that it is compatible with Windows 2000 along with the software you intend to install by checking the Hardware and Software Compatibility Lists provided by Microsoft.
-
If there is a hardware compatibility problem and you need drivers, or the motherboard's Bios needs to be replaced, this has been done. If you need more information regarding Bios issues, follow this link: Bios Issues and Windows 2000 Professional
-
The hard drive to be used for the installation has been partitioned (F'disked), new partitions installed and then formatted and checked for errors. If you need help with partitioning a hard drive, then follow either of these links: Partitioning for Windows 2000 or Formatting for Windows 2000.
-
A fresh installation will prevent you from migrating any problems that may relate to the former operating system, such as incorrect drivers, settings and incompatible files to Windows 2000.
Tuesday, November 27, 2007
STEP FOR INSTALLING WINDOWS XP
INTRODUCTION
Upgrade to Windows XP
Install Windows XP to a new hard disk
Install Windows XP to a new folder
Perform a clean install of Windows XP
Perform a multiple boot operation
INTRODUCTION
loadTOCNode(1, 'summary');
This step-by-step article describes how to install Windows XP.
Upgrade to Windows XP
This section describes how to upgrade to Windows XP from Microsoft Windows 98, Microsoft Windows Millennium Edition (Me), and Microsoft Windows 2000 Professional.Note Before you start the upgrade process, obtain and install the latest BIOS upgrade for your computer from the computer's manufacturer. If you update the BIOS after you upgrade the computer, you may have to reinstall Windows XP to take advantage of features such as Advanced Configuration and Power Interface (ACPI) support in the BIOS. Update the firmware in all of your hardware devices before you start the upgrade if you can.Also, you may want to disconnect from the Internet during the installation. Disconnecting from the Internet during the installation helps protect you from malicious users. You may also want to enable the Microsoft Internet Explorer firewall. For more information, see the "Enable or disable Internet Connection Firewall" topic in Windows XP Help.
1.
Start your computer, and then insert the Windows XP CD-ROM into the CD-ROM drive.
2.
If Windows automatically detects the CD-ROM, click Install Windows to start the Windows XP Setup Wizard. If Windows does not automatically detect the CD-ROM, click Start, click Run, type the following command, and then click OK:
CD-ROM drive letter:\setup.exe
3.
When you are prompted to select an installation type, select Upgrade (the default setting), and then click Next.
4.
Follow the instructions on the screen to complete the upgrade.o soft Knowledge Base:
After you have backed up all your important information, follow these steps to install Windows XP:
1.
Start your computer from the Windows XP CD-ROM. To do this, insert the Windows XP CD-ROM into your CD drive or DVD drive, and then restart your computer.
2.
When you see the "Press any key to boot from CD" message, press any key to start the computer from the Windows XP CD-ROM.
3.
At the Welcome to Setup screen, press ENTER to start Windows XP Setup.
4.
Read the End-User License Agreement, and then press F8.
5.
Follow the instructions on the screen to select and format a partition where you want to install Windows XP.
6.
Follow the instructions on the screen to complete Windows XP Setup.
Install Windows XP to a new hard disk
loadTOCNode(2, 'summary');
To install Windows XP to a new hard disk, you must start your computer by using one of the following media:
•
Microsoft Windows 98/Windows Millennium startup disk
•
Windows XP boot disks
•
Windows XP CD-ROMInstall Windows XP to a new hard disk
loadTOCNode(2, 'summary');
To install Windows XP to a new hard disk, you must start your computer by using one of the following media:
•
Microsoft Windows 98/Windows Millennium startup disk
•
Windows XP boot disks
•
Windows XP CD-ROM
Note If you want to start your computer from the Windows XP CD-ROM, your CD-ROM or DVD-ROM drive must be configured to do this. For information about how to configure your computer to start from the CD-ROM or DVD-ROM drive, see the documentation that is included with your computer or contact the computer manufacturer. To install Windows XP to a new hard disk:
1.
Read the End-User License Agreement, and then press F8.Note If your Windows XP CD-ROM is an upgrade, you are prompted to insert a CD-ROM of a previous operating system to verify upgrade compliance. Remove the Windows XP CD-ROM, and then insert the CD-ROM from your previous operating system into the CD-ROM drive. You can use the CD-ROM to upgrade from the following versions of Windows:
Windows 98Windows 98 Second EditionWindows Millennium EditionWindows NT 4.0Windows 2000 Professional
2.
When you are prompted for the Windows XP CD-ROM, remove your previous operating system CD-ROM, and then insert your Windows XP CD-ROM.
3.
To install Windows XP by starting the computer from the Windows XP CD-ROM, insert the Windows XP CD-ROM into your CD-ROM or DVD-ROM drive, and then restart the computer.
4.
When you see the "Press any key to boot from CD" message, press any key to start the computer from the Windows XP CD-ROM.
5.
At the Welcome to Setup screen, press ENTER to start Windows XP Setup.
6.
Follow the instructions on the screen to select and format a partition where you want to install Windows XP.
7.
Follow the instructions on the screen to complete Windows XP Setup.
Back to the topNote If you want to start your computer from the Windows XP CD-ROM, your CD-ROM or DVD-ROM drive must be configured to do this. For information about how to configure your computer to start from the CD-ROM or DVD-ROM drive, see the documentation that is included with your computer or contact the computer manufacturer. To install Windows XP to a new hard disk:
1.
Read the End-User License Agreement, and then press F8.Note If your Windows XP CD-ROM is an upgrade, you are prompted to insert a CD-ROM of a previous operating system to verify upgrade compliance. Remove the Windows XP CD-ROM, and then insert the CD-ROM from your previous operating system into the CD-ROM drive. You can use the CD-ROM to upgrade from the following versions of Windows:
Windows 98Windows 98 Second EditionWindows Millennium EditionWindows NT 4.0Windows 2000 Professional
2.
When you are prompted for the Windows XP CD-ROM, remove your previous operating system CD-ROM, and then insert your Windows XP CD-ROM.
3.
To install Windows XP by starting the computer from the Windows XP CD-ROM, insert the Windows XP CD-ROM into your CD-ROM or DVD-ROM drive, and then restart the computer.
4.
When you see the "Press any key to boot from CD" message, press any key to start the computer from the Windows XP CD-ROM.
5.
At the Welcome to Setup screen, press ENTER to start Windows XP Setup.
6.
Follow the instructions on the screen to select and format a partition where you want to install Windows XP.
7.
Follow the instructions on the screen to complete Windows XP Setup.
Tuesday, November 20, 2007
First Assignment

Expansion Slots
Short for Peripheral Component Interconnect, a local bus standard developed by Intel Corporation. Most modern PCs include a PCI bus in addition to a more general ISA expansion bus. PCI is also used on newer versions of the Macintosh computer.PCI is a 64-bit bus, though it is usually implemented as a 32-bit bus. It can run at clock speeds of 33 or 66 MHz. At 32 bits and 33 MHz, it yields a throughput rate of 133 MBps. Also see PCI-X and PCI Express.Although it was developed by Intel, PCI is not tied to any particular family of microprocessors.

Memory
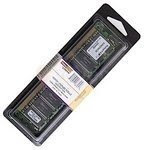
Kingston is the world's largest independent memory manufacturer. In today's performance-driven environment, memory upgrades provide an easy, economical alternative to increase system performance. Every memory product Kingston offers is designed to help you get maximum performance at the best price to you.This memory is designed for the following systems:HP ProLiant ML350 Generation 4 (G4); HP ProLiant DL360 Generation 4 (G4).

Processor
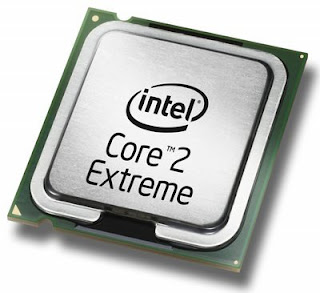
Intel® Core™2 Extreme Processor
With four cores and high scores, the Intel® Core™2 Extreme processor QX6850 is flat out the most extreme desktop processor. It's Intel's top of the line quad-core processor specifically built for hardcore enthusiasts who don’t take kindly to compromise. Based on the Intel® Core™ microarchitecture, the Intel Core 2 Extreme processor QX6850 is the ultimate multimedia engine. And the performance? It eats benchmarks for breakfast.
